The Ethics Commission is the filing officer for a variety of disclosure forms that are required to be filed under state and local law. Some disclosure forms filed with the Ethics Commission are filed electronically via DocuSign and are accessible to the public in PDF format. In addition, the information collected on the forms is parsed into machine readable data and extracted into datasets posted to the DataSF Open Data web site. Some Ethics Commission forms request lists of information to be disclosed, in which case the cover sheet data and the lists may be parsed into separate datasets. This creates a one-to-many relationship between the cover sheet information and the list of information which needs to be joined together to do certain types of research. Storing the cover sheet information of the form separately from any lists (or the normalization of data), will result in better database performance and reduce the size of the datasets. This document discusses how to do a join using Microsoft Excel:
Example of a Join Using Microsoft Excel
Joining data using SFEC Form 126f2 – Notification of Submission of Proposal
SFEC Form 126f2 collects cover page information about City agencies seeking to enter into a proposed contract. The form requires City agencies to report a list of the names of all contractors and subcontractors that are listed in the proposal and the date the proposal was submitted. This information is parsed into two datasets. In this case, for each name on the “Named Parties” dataset that includes contractors and subcontractors, we want to be able to see the related cover page information.
- SFEC Form 126f2 – Notification of Submission of Proposal (Cover Page Information)
- SFEC Form 126f2 – Named Parties (List of Contractors and Subcontractors)
To connect the cover page to the list, do the following (Note: Some of the steps may differ depending on the version of Excel. The follow instructions were drafted based on Excel 2019):
- In a web browser, go to the SFEC Form 126f2 – Notification of Submission of Proposal (Cover Page Information) page and click “Export” > “OData”.
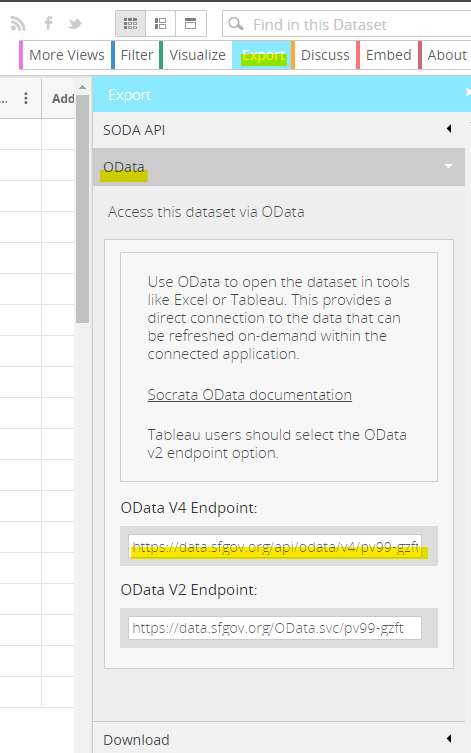
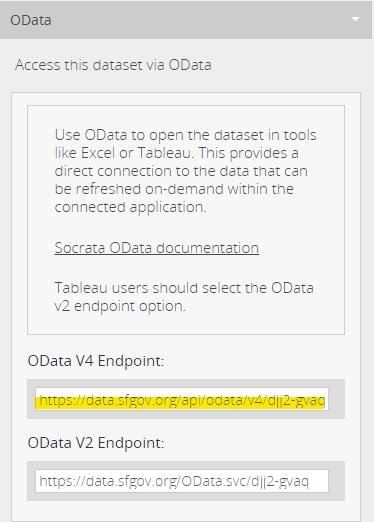
- Copy the “OData V4 Endpoint. In this example, it is https://data.sfgov.org/api/odata/v4/pv99-gzft
- Open Microsoft Excel 2016/2019 or Excel 2013 with the PowerQuery Add-in.
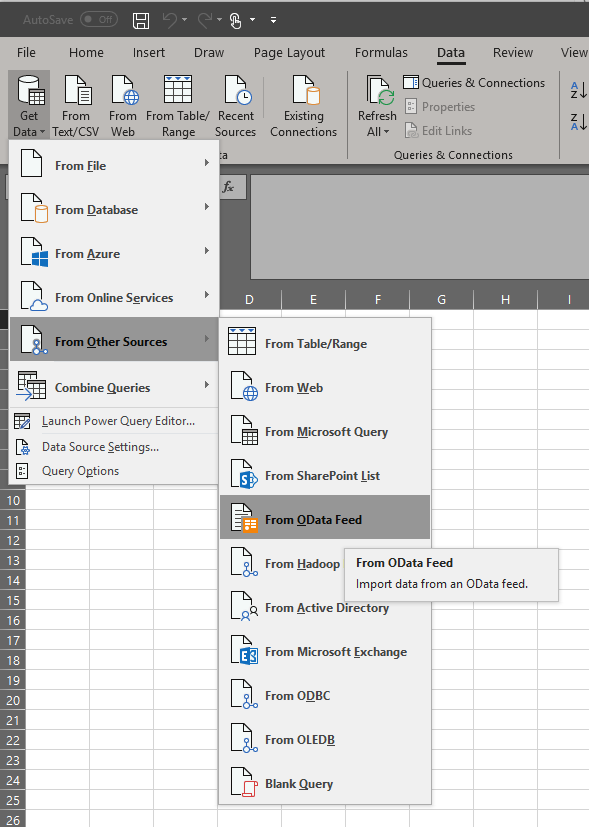
- In Excel, go to the “Data” Tab > “Get Data” > “From Other Sources” > “From OData Feed”
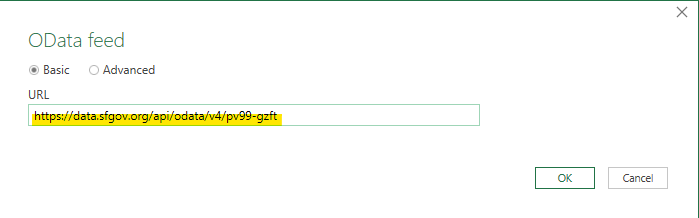
- In the “OData Feed” dialog box, paste the OData address: https://data.sfgov.org/api/odata/v4/pv99-gzft and click “Ok”
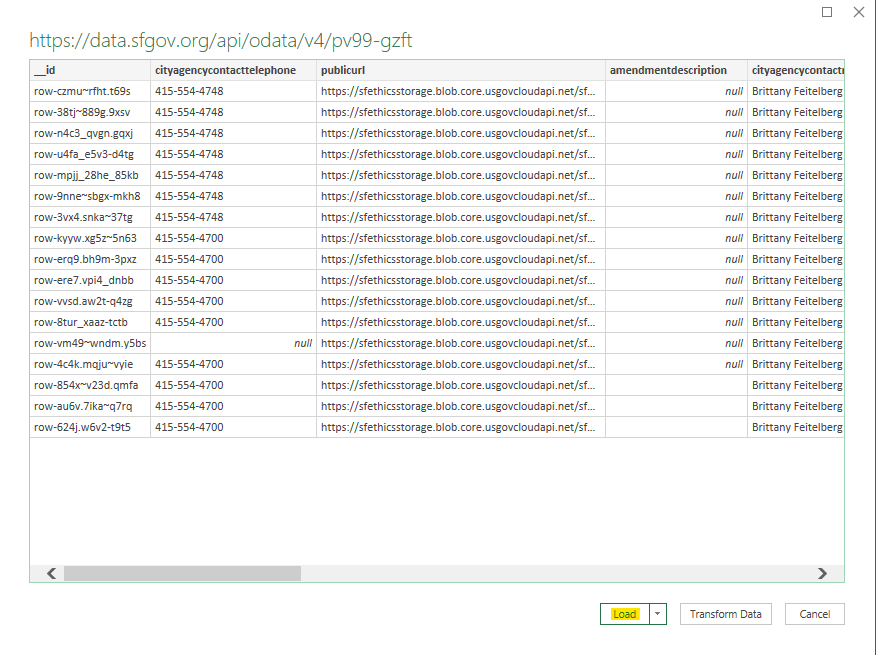
- A preview of the data download will appear. Click “Load”.
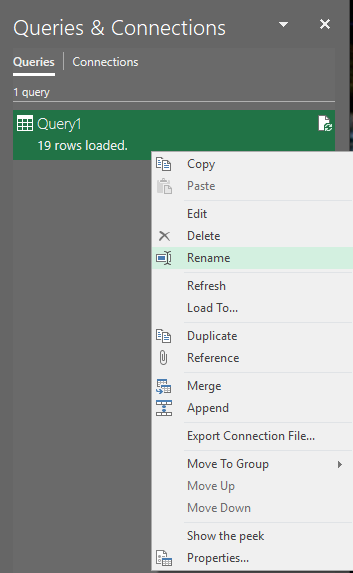
- In the “Queries & Connections” side-bar, right-click “Query1” and choose “Rename”. Name the query “Notification of Submission of Proposal Query”.
- In a web browser, go to the SFEC Form 126f2 – Named Parties (List of Contractors and Subcontractors) page and click “Export” > “OData”.
- Copy the “OData V4 Endpoint. In this example, it is https://data.sfgov.org/api/odata/v4/djj2-gvaq
- In Excel, go to the “Data” Tab > “Get Data” > “From Other Sources” > “From OData Feed”
- In the “OData Feed” dialog box, paste the OData address: https://data.sfgov.org/api/odata/v4/djj2-gvaq and click “Ok”
- Go to the “Data” Tab > “Get Data” > “From Other Sources” > “From OData Feed”
- A preview of the data download will appear. Click “Load”.
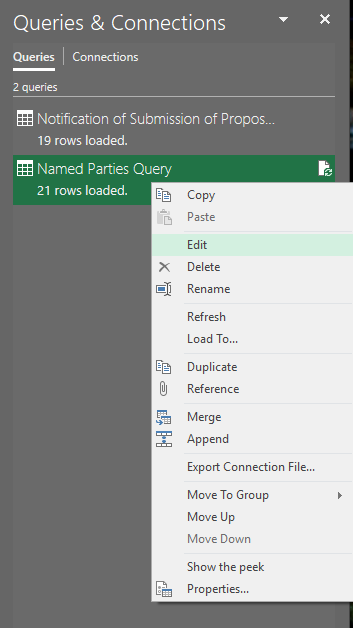
- In the “Queries & Connections” side-bar, right-click “Query1” and choose “Rename”. Name the query “Named Parties Query”.
- In the “Queries & Connections” side-bar, right-click “Named Parties Query” and choose “Edit”.
- In the toolbar, click the arrow next to “Merge Queries” and choose “Merge Queries as New”.

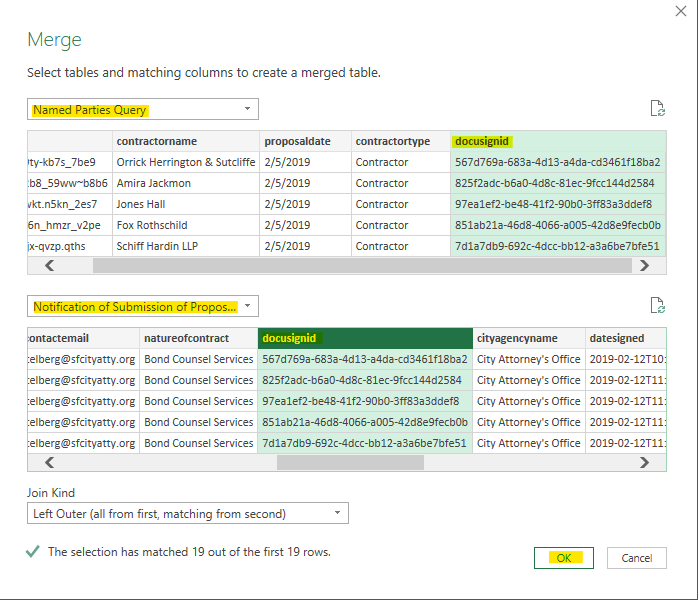
- In the “Merge” dialog box, choose “Named Parties Query” in the top table and “Notification of Submission of Proposal” in the bottom table.
- Click the “docusignid” column in each table.
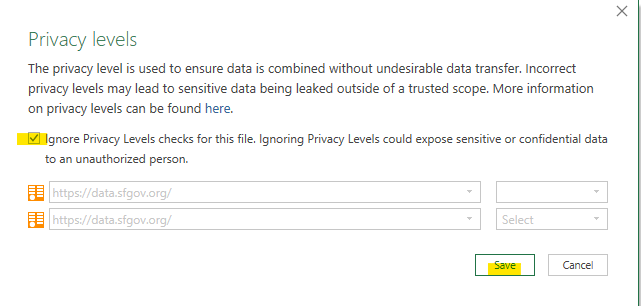
- If the “Privacy levels” dialog box appears, choose “Ignore Privacy Levels” and click “Save”.
- In the “Merge” dialog box, click “OK”.
- In the “Merge1 – Power Query Editor” window, click diverging arrows icon in the column header of the “Notification of Submission of Proposal Query” column.

- Click “Ok” in the dialog window to include all of the columns.

- In the toolbar, click “Close & Load”.
- Save the workbook.
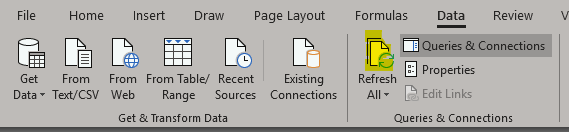
- These steps only need to be performed once. To update the data in the future, in Excel, go to the “Data” tab > “Refresh”. Click “Refresh”. This will fetch the latest data and update the merged query.